Australia Wide Shipping
Australia Wide Shipping

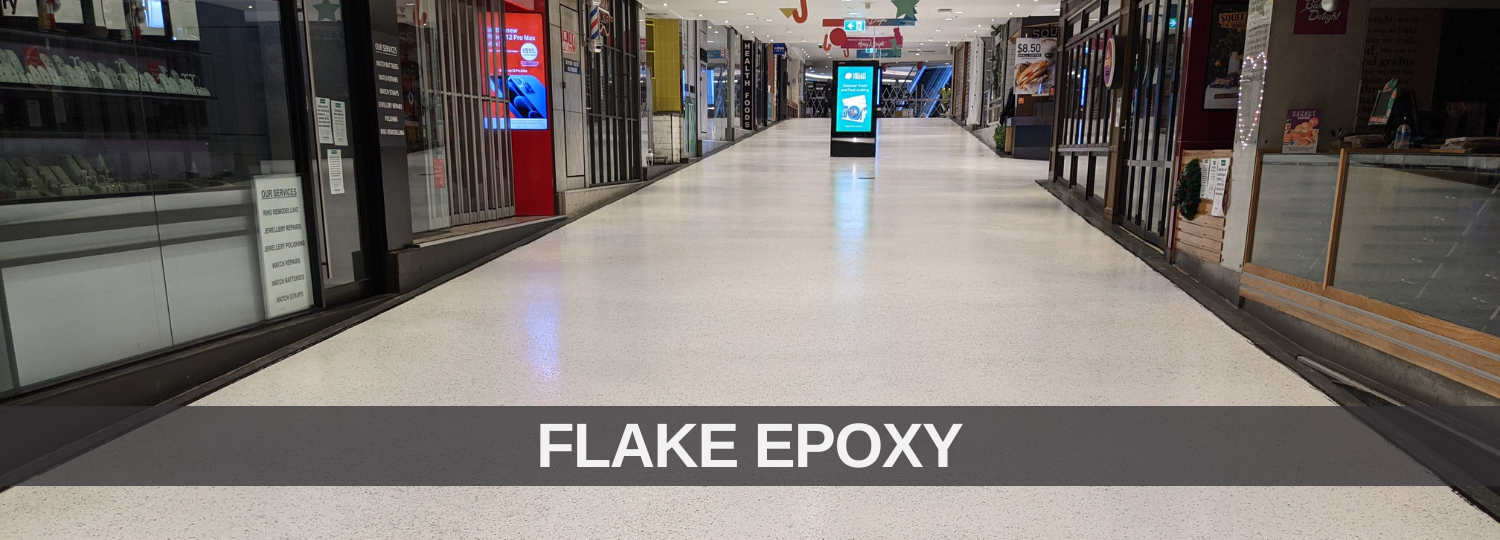
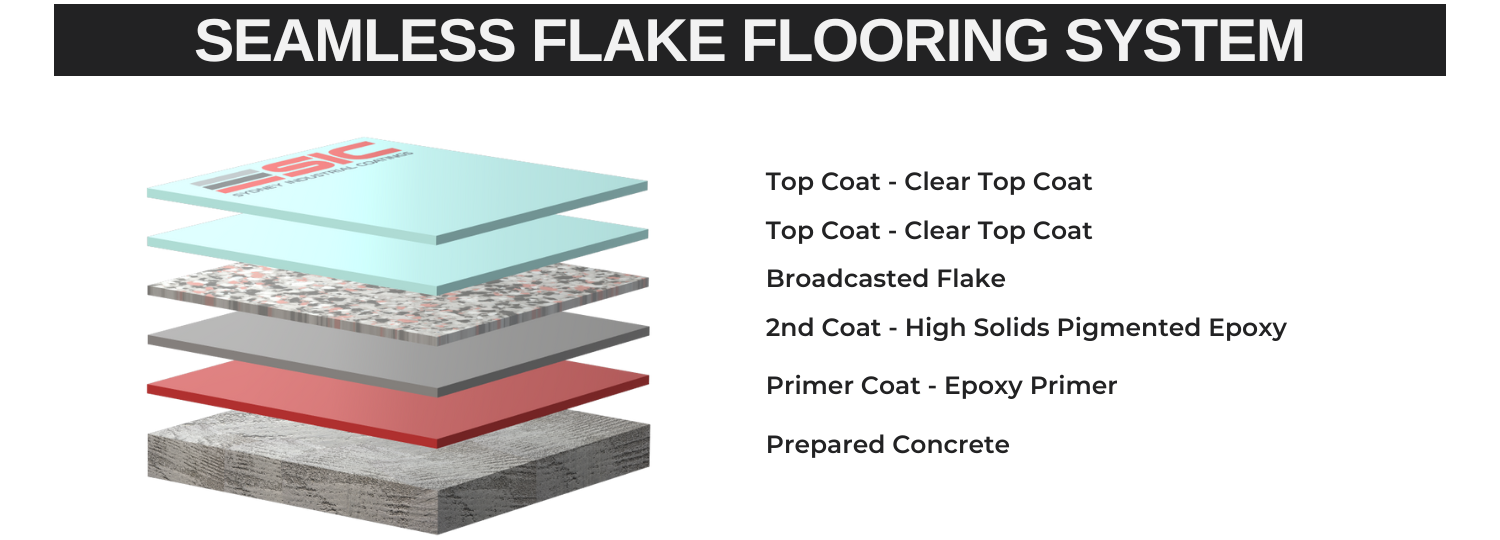
Epoxy Flake Systems are the most recommended flooring for showrooms and retail spaces as proven through the vast advantages that accompany this floor coating application. This method of epoxy flooring is made by broadcasting small chips or flakes of colored vinyl or acrylic onto a base coat of epoxy. The flakes are then sealed with a clear topcoat of epoxy to create a durable and attractive surface.
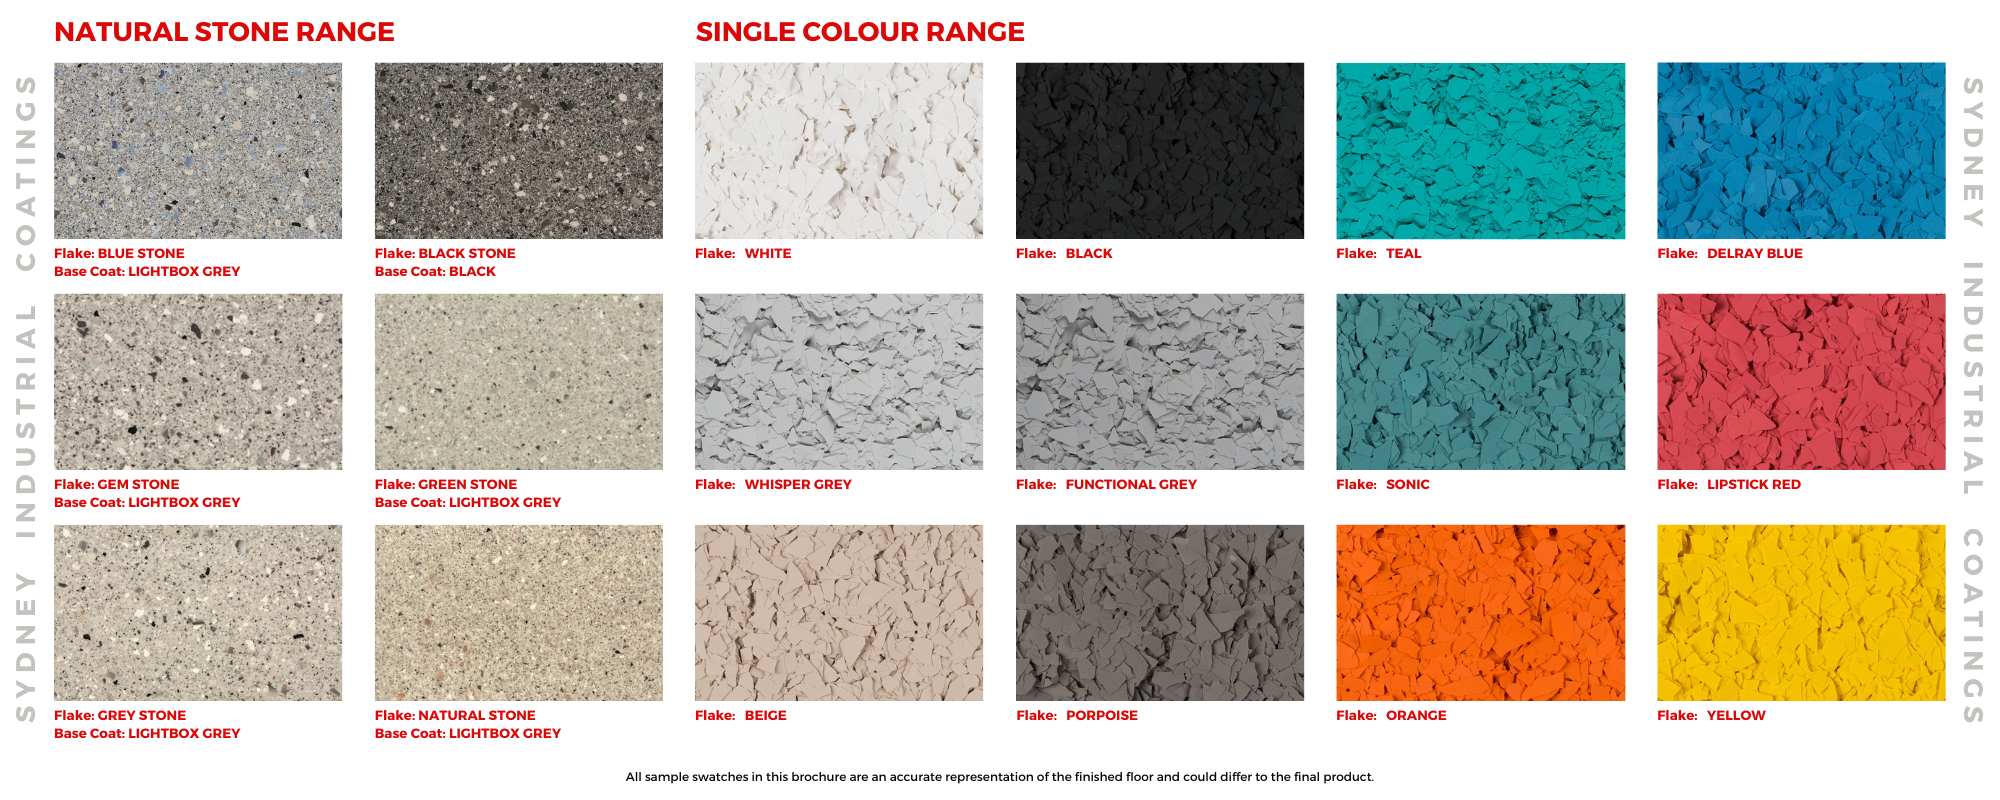
Flake epoxy flooring is a great option for retail spaces as it provides a unique and textured look that can hide imperfections, scratches and stains. The flakes come in a variety of colors and sizes, allowing you to create a custom look that complements your brand and product offerings.
Flake epoxy floors are also naturally slip-resistant, making it a safe option for high-traffic areas. It’s easy to clean and maintain, and the surface can be customized with logos or graphics to create a branded look personalised to you. Additional anti-slip media can be added if a higher slip rating is required.
When choosing a flake epoxy coating, consider the size and color of the flakes, as well as the overall aesthetic of your brand. It’s best to speak with a professional flooring contractor who can help you choose the right combination of colors and flakes to achieve the look you want for your showroom or retail space. Contact us today and speak with one of our highly qualified representatives.

Showing 1–8 of 10 results
To achieve a successful floor coating system make sure your surface is free of dust, oil/grease, any loose particles or paint and moisture. Click on the options below for further information
Epoxy Flooring Tools Information
Epoxy Floor Coating Preparation
Floor Grinders: Rubicon 480mm Grinder | Husqvarna 450mm Grinder | Scintex 250mm Grinder
Vacuums & Dust Extractors: Floorex | Husqvarna S36 (3 motor phase) | Husvarna S13 (single phase)
Diamond Grinding Plugs: Rectangle | Arrow | PCD (to remove previously coated or adhesives on the floor)
Redi-Lock Diamond Plugs: Sydney Industrial Coatings (9 pack)
Diamond Grinding Cup Wheels: 125mm to 250mm
Fill in all your cracks using a 2-pack epoxy filler and wait until the patching mortar is fully cured before grinding or coating the floor, this process usually takes a minimum of 6 – 8 hours.
For larger cracks and spalls: SIC Epoxy Coving & Repair Kit | Sika Sikadur 31 CFN
For smaller patching and cracks: Sika Sikadur 33 | Sikadur 513 (magic powder mixed into epoxy to thicken up)
General curing time (at 20°C) is a minimum of 8 hours. This can vary further if solvent has been added to the epoxy.
Sika Australia: Sikafloor 160 (up to 40sqm) | Sikafloor 94 (recommended) | Sikafloor 158W (moisture barrier)
UltraKote: High Solids Epoxy
Elite Crete Systems: E100-VB5 Epoxy Vapor Barrier
EpiMax: Epimax 237WB (water based)
This is an important step for if the coating is left uneven, this will show though your final coat. If this step if not completed within 30 – 36 hours (depending on temperature) of applying the previous coat, the floor will need to be scratched using an 80 grit sand paper.
We recommend always having a minimum of two people when completing an epoxy floor, this is to ensure the product does not begin to cure before you have finished broadcasting the flake. If there is no one to help, we would suggest applying in sections based on works time and pot life of product being used.
High Solids Epoxies: UltraKote High Solids Epoxy
100% Solids Epoxies: Sikafloor 264 | Elite Crete Systems PT4 (pretinted)
UV Stable Polyurethanes: Sikafloor 359 AU | EpiMax 920
UV Stable Polyaspartic: EpiMax 842
We recommend broadcasting the flakes to the point of rejection, this means that you will keep apply the flake until the epoxy cannot have any more flake added to it. This is beneficial as a full epoxy flake system will hide imperfections for longer with its design. Wearing spike shoes to walk over the epoxy is essential with flake epoxy flooring, however you must apply safety practices and be cautious of injury.
For easier clean up you can use a blower to move the bulk of the flake to a corner and scoop up. Using thinners in the final (or finish) coat is not recommended.
Epoxies: Sika Sikafloor 169 | Elite Crete Systems VR1
Polyurethanes: Sikafloor 359 AU | UltraKote UVSeal | UltraKote SuperClear WB
Polyaspartic: EpiMax 920
If you are using a high body, self-levelling 100% solids epoxy, one squeegee coat will be enough. Using waterbased products, polyurathanes or polyaspartic products will require an additional coat. . Using thinners in the final (or finish) coat is not recommended. It is always recommended to back roll the product against the natural light to assist with achieving a more uniform finish.
Epoxy Glitter can be mixed into the final coat to create a stunning, eye-catching effect on the floor.
Antislip media can be added to the topcoat to achieve a higher slip rating.
Your floor will be trafficable after 24-48 hours and heavy items such as cars, boats or trailers shouldn’t be parked on the floor for 7 days after application of the final coat

