How To Apply Flake To A Garage Floor?
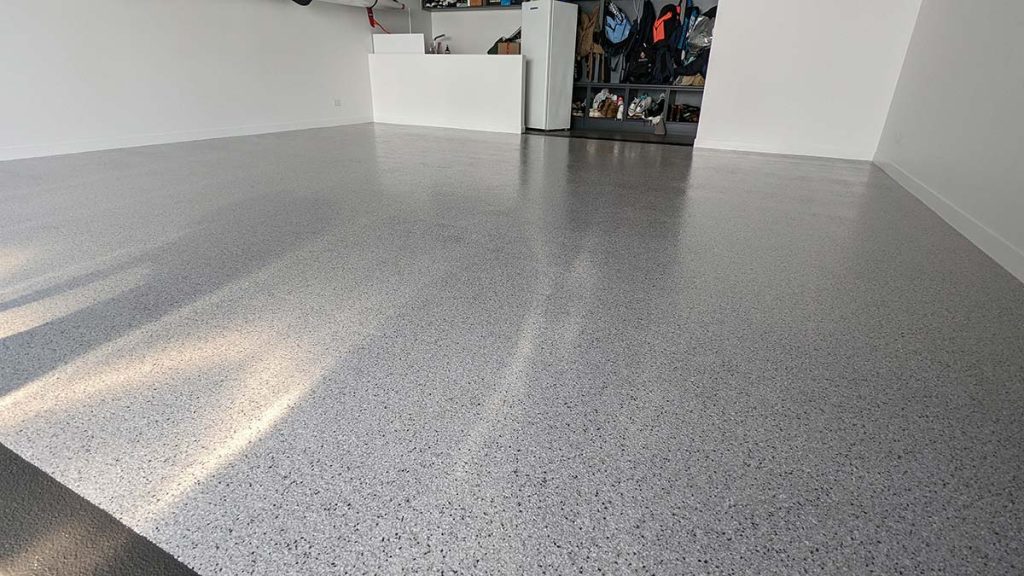
A garage is often more than a storage space left to its own condition. Homeowners everywhere are seeing the potential of these spaces. They respond accordingly by ensuring that the flooring is in perfect condition, with many choosing to apply epoxy over the top of their concrete floor base. On its own, an epoxy coating still offers gloss and sparkle.
Yet many people want to go a step further. As part of the flooring installation process, they choose to apply epoxy flakes to the floor finishing, and it is not hard to see why. When applied correctly, these little bursts of colour will enhance the aesthetic appearance of any concrete coating while also being versatile in terms of their colour combinations and density.
Here we will look at precisely what epoxy flakes are and the most efficient way to permanently commit your chosen arrangement to your garage floor.
What are epoxy flakes?
Epoxy flakes are a set of polymer-based aggregates that come in a vast arrangement of colours and textures. They consist of acrylic and vinyl resins and, when used in conjunction with epoxy floor coatings, provide a wide array of flooring options for your garage.
They are also highly versatile in terms of the size of flake and the level of coverage applied to the base coat of epoxy, so no two examples of flake flooring will ever look the same. Sizes of flake range from micro, small, large, and XL flakes, and coverage comes in four main types, ranging from light refusal to entire broadcast.
As well as looking great, several additional benefits come with applying an epoxy flake floor system:
- A heavier coverage acts as an excellent anti-slip material: As with any smooth surface, a basic epoxy flooring installation has an appealing aesthetic but the potential to cause slips if not treated with anti-slip additives. Heavy coverage of epoxy flakes will serve this purpose, with the material of the flakes providing grip underfoot.
- U.V stable: While a base epoxy coating has the potential to dull over time if exposed to harsh sunlight, epoxy flakes are resistant to this when used in conjunction with an additional layer of polyurethane. This means you will not worry about your flake floor system ambering.
- Further hiding of imperfections: A base epoxy coat flooring does an excellent job in sealing cracks and hiding minor stains and blemishes. However, for more noticeable marks, heavy coverage flake floors go one step further, with their textures and colours acting as ideal concealment.
How to install and apply epoxy flake flooring?
Installing an epoxy flake flooring system is not a hugely complex process and is entirely possible to achieve yourself if you are not in a position to pay for professionals. However, each step is crucial if you wish to achieve the best results, and each should be taken seriously. With that being said, here is our methodology for installing epoxy flake floor systems.
Step 1: Prepare your concrete base
Make sure that your concrete surface has a roughened quality and texture. You can achieve this through shot blasting, grinding, or acid etching. This gives the epoxy coating more opportunity to bind with the concrete during the hardening process. The more binding takes place, the more durable and persistent your installations will be.
While an epoxy base coating does an excellent job filling in crevices and increasing durability, there are specific preparations you should make. Vacuum the top layer of the concrete and buffer to ensure that dirt and imperfections are removed. If previous paint jobs are still lingering in places, use a sharp scraper to remove these as best you can.
As a final step of preparation, you may wish to wipe the floor with a denatured alcohol solution to remove those last lingering dust areas.
Step 2: Apply the primer base 100% solids epoxy coating
Using a base roller and spiked shoes, begin to apply the initial epoxy coating that will bond to the concrete. Make sure that the mixture is at room temperature before applying. Begin from the perimeter of the room and work your way inward using long, smooth application lines.
Depending on your concrete base’s level of wear and tear, you may wish to apply a primer or sealer coat before the epoxy coating. The sealer primer phase maximises the level of bonding between the concrete and the epoxy coating. It can also seal pockets of air within the concrete that might otherwise affect the process and cause bubbling.
After, you will need to apply a base coat over the primer and then broadcast the flake.
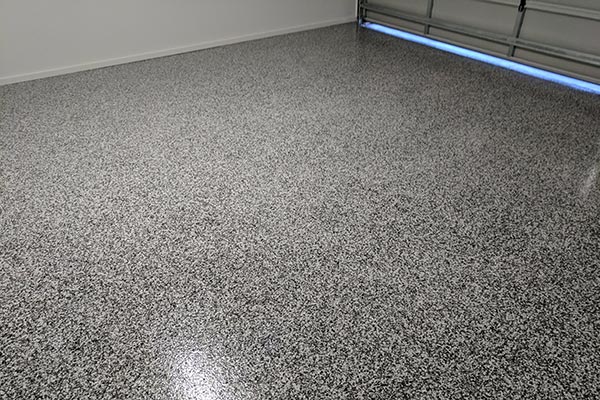
Step 3: Apply the epoxy flakes
While the epoxy base coating is still soft and malleable, begin to apply your epoxy colour flakes. You should start to apply the flakes within ten minutes of completing your epoxy coating. Here, you will need to consider your design choices, affecting how you apply the chips.
With your flakes in a large bucket, take small handfuls and fling them. This will allow them to distribute naturally and in a more even manner. Avoid directly throwing them onto the ground, even if you are going for an entire broadcast. This will result in an uneven finish.
For lighter coverage, it might be an idea to separate your floor space into sections and provide each area with an equal amount of flakes. This will ensure each section remains similar in terms of final coverage.
For the entire broadcast, your goal is to ensure that all areas of the epoxy coating are covered. It might still be worth sectioning your floor to some degree, as what you don’t want is to heavily cover most of the surface only to run out of chips and leave a section bare.
Step 4: Scrape away unsecured flakes
Before applying the protective topcoat, you must ensure that any flakes not adhering to the coating are removed. It should be easier to detect these areas for lighter or medium coverage, and the task can be done using a scraper to knock and flatten the protruding chips into place.
It would be more prudent for the entire broadcast to blow the single flakes into a corner of the room first, as there will be a lot of them. Once this is done, you can go back over the floor with the scraper as before. Then vacuum the last residual flakes to finish, and let the flake and base coat cure overnight
Step 5: Apply the protective topcoat
Once you are happy with your flake flooring arrangement, the final protective polyurethane topcoat needs to be applied.
Based on your aesthetic choice, it can either be matte or gloss and should be applied using spiked shoes. Depending on your desired texture, you may wish to add one or two final coats, with one application resulting in a rougher surface with more grip.
Once the protective topcoat has been applied, it should take an additional four hours before the floor has hardened. It will take around 12 hours for the product to harden. Try to ensure that your space is well-ventilated during this curing process.
Summing up
If you choose to complete the epoxy flooring installation yourself, you will need the right products. Over the past decade, we have worked tirelessly to ensure our customers only receive a first-class, long-lasting, reliable range of goods from leading manufacturers. Contact us today or Contact Epoxy warehouse to find the best solution to your situation.