Australia Wide Shipping
Australia Wide Shipping


Coving is an essential requirement in providing a food safe environment in floor coating applications, specifically Commercial Kitchens. It is important to ensure there are no areas that can harbour bacteria or mold which is why the curved surface is critical.
Coving is applied as a smooth, curved surface that seals and closes the gap between your floor and the wall. This creates a seamless finish to ensure there is no crevice or crease that could cause bacteria to grow and can be completed as an Epoxy Coving or Aluminium Coving installation.

Preparation is the most important key to successfully installing any Epoxy Floor Coating!
Apply cloth tape to the wall to achieve a straight line and mark the required height of your coving
Apply masking tape to the floor to achieve the width of your coving
(Standard distance is: Height 100mm | Width 50mm)
As per the manufacturer’s ratio instructions, Power mix Part A and Part B for 2 minutes
From your mixed epoxy, apply a coat to the area between the 2 masking tapes with a brush
(This is the priming stage)
Add sand mixture to the remainder of the mix and power mix for 2 minutes to ensure a consistent and uniform mixture
Pour the mix on the floor and push up the wall
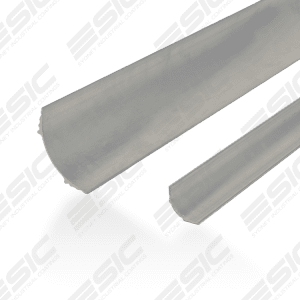
You can use a 50mm PVC Pipe (Length: 350mm-400mm) whilst ensuring the ends are at 0 in ¼ circular motions or a coving tool
Continue steps around all perimeter walls
After 10 minutes, with a clean brush that has been dipped in solvent, run the wet brush over the coving to smoothen it out
Depending on the temperature of the day, masking tape can be removed 15 – 30 minutes later
Allow the coving to cure
Power mix pigment into Part A for 1 minute, as per the manufacturer’s ratio instructions
When ready – Pour PART B (hardener) into your Resin (Part A) and power mix for 2 minutes, as per the manufacturer’s ratio instructions
Use brush to coat the covings and apply the rest of the mixture to the floor
Allow to cure and repeat steps 10-12 for 2nd epoxy coat
IMPORTANT NOTE: Ensure there is no lip at either end once the tape is removed – if there is a lip, try to smooth it out with the brush dipped in solvent – If the lip remains the coving may not comply with food safety regulations.
Showing all 4 results